Peacock from origami modules: assembly diagram
If you have a significant amount of patience andassiduity, then any applied creativity, including origami, is up to you. Creating crafts from paper - creativity, whose age is hundreds of years. Origin of origami is Japan, which many centuries ago, Chinese monks brought the paper. And only in the middle of the nineteenth century the art of folding paper figurines came to Europe.

Modular origami
One of the most popular areas of origamiis considered modular. The first mention of modular origami dates back to 1710. Learn this skill is not as problematic as it seems at first glance. The main thing here is to understand the technique of adding one module. And then to make of an individual paper units an unusual flower, an elegant bird or an animal will not be so difficult.
If in ordinary origami the figure consists of only one leaf, then in the modular "takes part" a multitude of multicolored or monophonic sheets, folded in a special way.
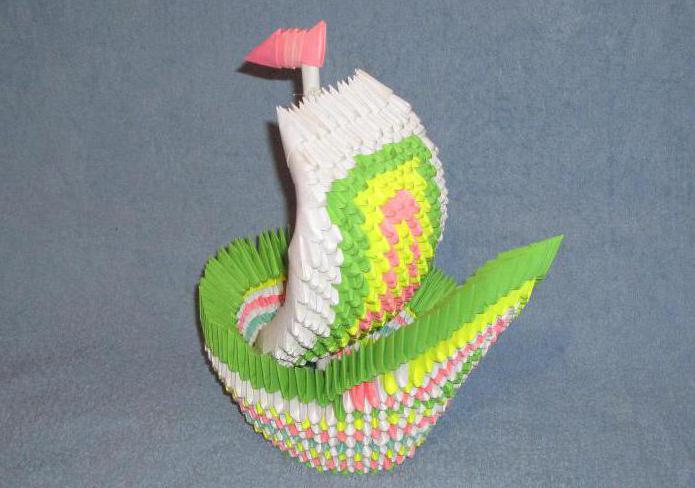
We suggest that you stock yourself with a bit of patience andmaster this technique. Theme today is "Peacock from the modules". The master class will consist of learning the technique of folding a single module and a scheme that will help to collect a beautiful bright bird. We will offer several photovariants, which color scale and technique to adhere to - everyone will already decide for themselves.

Make the module
To begin, let's learn how to make singledetails - modules. Any figure in origami consists precisely of them, and the peacock of the modules will also be added. A step-by-step instruction is presented in the photo, but we will add a few explanations in words.
To make a beautiful figure in technologymodular origami, you need a piece of paper. Aspect ratio must necessarily be one to two. That is, one side should be exactly twice as long as the other. Depending on the size of the sheet, the size of the module and the craft itself will change.
The first thing to do is to fold the leafletin half. Then, outlining the center line, fold the corners of the paper to the center. We turn our workpiece and lower edges also bend to the bottom of the module. Now bend the bottom part up completely. The last step is to fold the triangle in half and it's ready. Now in the formed "pockets" we will insert one triangle into another. And thus we will have a beautiful peacock from origami modules, the scheme of which is understandable and simple.

How many triangles withpockets? How many blanks are needed? Peacock from origami modules, the scheme of which will be presented a little later, can have up to a thousand or more such blanks in its composition. It will remain to determine the color gamut and to procure such a number of modules of a certain color, which is necessary for each row of origami.
Tip: when you decide on the color scheme, then make a little more blanks of each color. Sometimes in the process of working the modules can be torn or deformed, and then they are no longer usable. The stock must always be there. We make more triangles so that we have a nice peacock from the origami modules (without any problems and time costs).
What will you need?
We will offer you our color scheme, but shecan be absolutely any. If you are planning that a peacock of origami triangular modules "settle" in your living room or a nursery, then the color scheme can be chosen so that the article is worthy of elements, successfully inscribed in the interior of the room. If you make it as a gift, then you can choose any color solutions that are just "to your liking" and "to your liking".

- 856 yellow blanks;
- 465 - green;
- 114 white modules;
- one red triangle for a spout;
- one black triangle;
- glue.
We will make a reservation at once. We offered the simplest set of colors to make it convenient to talk about how to make a peacock out of modules. But you try to make the color scheme even richer, especially in the place where the tail is located. Then the bird will turn out really graceful and bright.
First circles
Determine with the size and make the first circle,inserting one triangle into the pocket of the neighbor. Thus, in yellow, we will form three circles. Our initial circle will consist of the 31st triangle. In the fourth round, we will add other shades of "feathers". We do the following: the first green, the next yellow, then white, five yellow, one white, one green, the remaining yellow.

Doing down
Let's say right away that everyone has different views,how the peacock should look from the origami modules. The scheme can be borrowed from the Internet or drawn by you personally. Therefore, reduce in the area of the tummy do as shown in your diagram. We will do this after the fourth row and up to the eighth.
To do this, turn the model over and insert the triangles so that in the subsequent rows, one blank becomes smaller. Do not forget to observe the order of the colors given in the fourth row. The body is ready.
Breast
Now it's the breast turn. Peacock from origami modules, the scheme of which is proposed by us, has the same coloring in the chest area, as in the abdominal region. Therefore, we make the first row like this: the first triangle is green, three yellow, one green, three yellow and one final green module. Now you will need to make eight more rows, making a reduction in the neck area.
Neck
The neck is one of the most elegant parts, of whichconsists of any peacock from origami modules. Scheme and design of the neck in all models is similar to each other. At us it will consist of seventeen rows. We divide them in this way: even rows and odd. All the even ones will consist only of white triangles, there will be two. But the odd numbers are made up of three triangles: yellow - the first, then - green, the final - yellow. The last row is only white modules.

Head
The first three rows are done exactly in the same order,as they did on the neck. The fourth consists of two green blanks, the fifth - from one green triangle. Now it will be necessary to fix the spout, that is, add black and white modules at the end of the neck.
Tail and wings
As for the tail and wings, here we wouldadvised you to make a combined model. Take a few options and connect them together. The tail starts with eight or nine modules and then increases. Try to add workpieces gradually, so that the design is symmetrical.
As for the wings, there will be moreeasier. They begin, as a rule, with one of two triangles, then the attachment goes to two or three in one row. The upper, most fluffy part of the wing, can include up to fifteen modules. So our peacock is ready from the modules. The assembly scheme is simple, hopefully, it is described clearly. Everyone will cope with the task, even a beginner, who decided to train his patience.

Stand
It remains to make an elegant stand, on whichwill be located peacock of the modules. The scheme for creating such a support resembles the first rows of the peacock's body. That is, we make a circle of thirty modules, then add a few more rows. We insert the first rows of the body into the last rows of the support.