Do you need a crochet (crochet)? Scheme and description of its elements
In bad weather, I want to protect children from the cold ascan be more reliable. But how to do it, if my mother is not around? For example, in a kindergarten or school. Where children dress themselves and teachers with teachers do not always follow how the scarf is tied. The barnyard (crochet) will come to the rescue. The scheme of it is most often simple and the yarn is required much less than the scarf.
What parts does the product consist of?
The answer will be the same regardless of whether the shirt is crocheted or tied (crocheted). The scheme will always consist of two elements: a collar and a pelerine, joined together.
It can be completely knit or crocheted. It all depends on the skills of the needlewoman. In the most advantageous position are those who own both instruments. Then the collar can be tied with an elastic band on the spokes, and the cape can be laced with a hook.

How to tie a throat?
The most common is the shirt-front(crochet), the scheme of which is thought out so as to smoothly cling to the neck and slightly widen to the bottom. Her knit crosswise. To do this, you need to type a chain of loops that will provide the length from the collarbone to the very top of the neck. If the yarn is tight enough, then for an adult it will be a loop 17. When you need a shirt for a girl (crochet), the scheme will consist of fewer loops. Therefore, the number of columns should be counted.
First row: lifting from 3 loops, 4 columns with a crochet (then they will be designated as "SN columns"), 3 half poles of SN and 10 columns without a crochet (hereinafter "BN pillars"). It is worth noting that the beginning of the series is the bottom of the neck.
Second row: lifting loop, 10 BN columns, 3 half-columns of CH, 4 columns of SN. That is, he mirrored the previous series. Due to a gradual increase in the height of the columns, a natural rounding is obtained.
Continue to knit these two rows until the shirt (crochet), the scheme of which is given earlier, does not completely wrap around the neck.

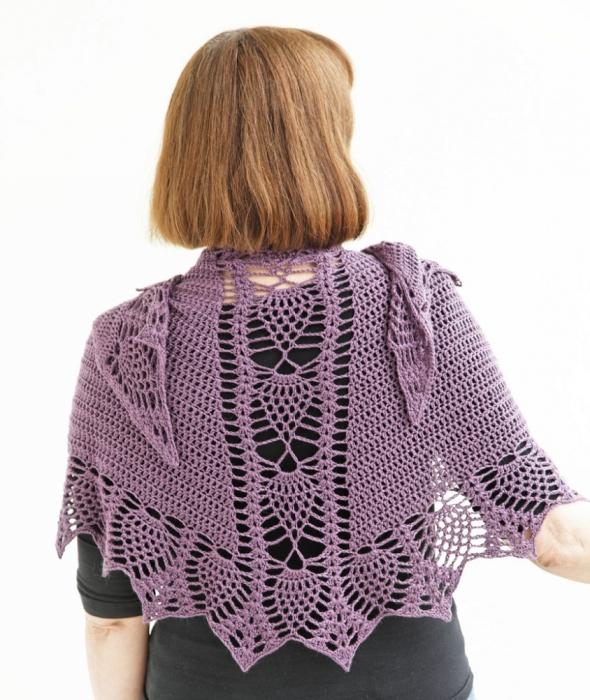
Possible pattern for a cape
With this detail, even the simplest shirt for a girl becomes beautiful. Hook scheme can be implemented any. Here is an example of the one that every needlewoman will handle.
In the first row, the fans consisting offrom two columns of HF, two air loops and two other columns of SN. The second row implies expansion. It is carried out by increasing the number of columns in each fan. To do this on a pair of columns make one the same, and in the arch of the air loops connect the 2 columns of CH, 2 air columns and 2 more columns of CH, complete this element with one more column of CH on the second pair from the fan of the previous row.
In the third row on the columns on the sides of the archIt will be necessary to link two columns of CH, and repeat the same figure in the arch. The fourth row repeats the third. And in the fifth column should be already three. The sixth row is a repetition of the fifth.
If necessary, the drawing can be continued. But most of the time this is enough to completely cover the shoulders of the girl. To get a more effective shirt-front (crochet), the scheme assumes the execution of the strapping with a suitable color tone. If you choose a yarn with a pile, then the product will become more elegant.

Option, when the shirtboy looks like a collar
In this case, the cape is not knit. All work stops after making the neck. It can be knitted both along and across.
A collar is beautiful if you useCrochet. Manishka (the scheme-description is presented below) goes from top to bottom. An example is a pattern. For him it will be necessary to type a chain of loops, the number of which is divided by ten, plus three more.
The first row (the second one is the same): three lifting loops; air; the column CH in the third loop of the chain; 3 columns of CH in the 7th, an air loop and three more columns of CH also in the 7th loop; the column CH in the 11th, then again air and the pattern repeats from the moment, where the element connected in the third loop is indicated. So to the end of the series, which must end with an element of two columns of CH, separated by one air loop.
Third row: swap elements. Where there was a fan to make an arch of two columns of HF and an air loop. And over a similar archo to tie a fan. The fourth or fifth row continues such a pattern, that is, a fan goes above the fan, and an arch above the arch.
The last two rows are a repetition of the first two. Manishka is ready. It remains only to sew on the buttons and decorate the edge with the eyelets for them.